Russell Hobbs Coffee Maker Manual: A Comprehensive Guide
This manual provides detailed instructions for various Russell Hobbs coffee maker models‚ offering 13 user guides for download‚ covering setup‚ operation‚ and troubleshooting.
Understanding Your Russell Hobbs Coffee Maker
Your Russell Hobbs coffee maker is designed for convenient and efficient brewing. Familiarizing yourself with its features ensures optimal performance and longevity. These machines come in diverse models‚ including 3-in-1 options like the 3323‚ and various stainless steel designs‚ such as the 10968S.
Key to operation is the digital timer‚ allowing for pre-programmed brewing. Understanding the clock function – a 24-hour format – is crucial for setting brew times. The coffee strength control‚ often adjusted with a dedicated button‚ influences the brew’s intensity.
Remember to always read the complete instruction manual before initial use‚ paying close attention to safety precautions and proper cleaning procedures to maintain your appliance.
Identifying Your Model Number
Locating your Russell Hobbs coffee maker’s model number is essential for accessing the correct manual and support resources. This number uniquely identifies your specific appliance‚ ensuring you receive tailored guidance. It’s typically found on a sticker or plate affixed to the bottom or back of the coffee maker unit.
Common examples include models like 3323 (3-in-1) and 10968S (10-12 Cup Stainless Steel with Digital Timer).
Having this number readily available when contacting customer support or searching for online documentation will significantly expedite the process of resolving any issues or answering your questions. Accurate model identification guarantees compatibility with relevant parts and troubleshooting steps.
Key Components and Their Functions
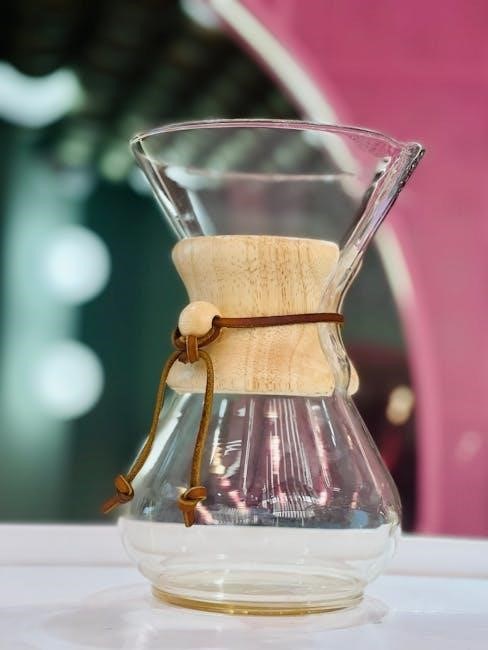
Your Russell Hobbs coffee maker comprises several key components working in harmony to deliver a perfect brew. The water reservoir holds the water supply‚ with capacity varying by model. The filter basket securely houses the coffee filter and grounds. A carafe‚ often glass‚ collects the brewed coffee.
Digital models feature a control panel with buttons for power‚ timer setting‚ and strength adjustment. The heating element heats the water‚ while the spray head evenly distributes it over the grounds.
Understanding each component’s role is crucial for proper operation and maintenance‚ ensuring optimal performance and longevity of your coffee maker.
Initial Setup and Preparation
Before your first brew‚ careful setup is essential. Remove all packaging materials and ensure all components are present. Place the coffee maker on a stable‚ level surface‚ away from water sources. Inspect the carafe and filter basket for any damage.
Familiarize yourself with the control panel and button functions. Ensure the power cord is securely plugged into a grounded outlet. Before brewing‚ it’s vital to thoroughly clean the machine – a crucial step detailed in the ‘First-Time Use’ section.
Proper initial preparation guarantees optimal performance and prevents any unwanted tastes in your first cup of coffee.
First-Time Use: Cleaning Before Brewing
Prior to your initial brew‚ a thorough cleaning cycle is paramount. Fill the water reservoir to its maximum capacity with fresh‚ clean water. Place the empty carafe into position on the warming plate. Without adding any coffee grounds‚ initiate a full brewing cycle.
This process effectively removes any residual manufacturing dust or debris that may be present within the system. Discard the water from the carafe after the cycle completes. Repeat this cleaning process at least twice to ensure a pristine brewing environment;
This initial cleaning safeguards the flavor of your coffee and extends the lifespan of your Russell Hobbs coffee maker.
Water Reservoir: Filling and Capacity
The water reservoir is designed for easy filling and accurate measurement. Locate the reservoir‚ typically at the rear or side of the coffee maker. Open the reservoir lid and fill with fresh‚ cold water to the desired level.
Refer to the markings on the reservoir to determine the appropriate amount of water for the number of cups you intend to brew. Most models feature clear level indicators.
Avoid overfilling‚ as this can lead to spillage during the brewing process. The capacity varies by model‚ with some offering up to 12-cup reservoirs. Always use filtered water for optimal taste and to minimize scale buildup.
Brewing Coffee: Step-by-Step Instructions
Begin by ensuring the water reservoir is filled with the appropriate amount of fresh‚ cold water. Next‚ insert a paper filter into the filter basket. Add the desired amount of ground coffee – typically one to two tablespoons per cup – into the filter.
Close the filter basket lid securely and place the carafe onto the warming plate. Press the power button to initiate the brewing cycle. The coffee maker will automatically heat the water and drip it through the coffee grounds.
Allow the brewing process to complete fully before removing the carafe. Some models offer a pause-and-serve function‚ allowing you to briefly interrupt the brewing cycle.
Adding Coffee Grounds: Quantity and Type
For optimal flavor‚ use freshly ground coffee beans. A general guideline is one to two level tablespoons of ground coffee per 6oz cup of water‚ but adjust to your preference. Experiment to find your ideal strength!
The type of grind is crucial; a medium grind is typically recommended for drip coffee makers. Too fine a grind can lead to over-extraction and bitterness‚ while a coarse grind may result in weak coffee.
Consider the roast level as well. Lighter roasts offer brighter‚ more acidic flavors‚ while darker roasts provide a bolder‚ more robust taste. Ensure the coffee grounds are evenly distributed within the filter for consistent brewing.
Setting the Timer Function
The timer function allows you to pre-program your coffee maker to automatically brew coffee at a desired time. First‚ ensure the clock is set correctly using the ‘h’ and ‘min’ buttons. Then‚ press the ‘Timer’ button – a display will likely indicate timer mode.
Next‚ set the desired brew start time using the hour and minute buttons. Confirm your selection by pressing the ‘Timer’ button again. The coffee maker will now automatically begin brewing at the programmed time‚ provided there’s water and coffee grounds present.
Remember the clock retains settings unless unplugged. Always double-check the programmed time to ensure your coffee brews when intended!
Coffee Strength Control
Russell Hobbs coffee makers often feature options to adjust brew strength‚ catering to individual preferences. Some models utilize a dedicated ‘Coffee Strength’ button‚ allowing you to cycle through settings like ‘Mild‚’ ‘Medium‚’ and ‘Strong.’ Pressing this button modifies brewing parameters‚ influencing the coffee’s flavor intensity.
Alternatively‚ the 1-4 cup function can subtly increase strength when brewing smaller batches. This is because the water passes through the grounds more slowly‚ extracting more flavor. Experiment with different settings and coffee-to-water ratios to discover your ideal cup.

Understanding your model’s specific controls is key to achieving the desired coffee strength. Refer to the detailed instructions for precise operation.
Using the 1-4 Cup Function
The 1-4 cup function on your Russell Hobbs coffee maker is designed for brewing smaller quantities of coffee‚ typically ranging from one to four cups. When activated‚ this setting adjusts the brewing process to optimize flavor extraction with reduced water volume.
Importantly‚ utilizing this function often results in a slightly stronger brew due to the slower water flow through the coffee grounds. This ensures a richer‚ more concentrated flavor profile even with a smaller batch.
To use‚ simply select the 1-4 cup option before initiating the brewing cycle. Ensure the carafe is appropriately sized for the desired amount. Refer to your model’s manual for specific button locations and operation details.
Adjusting Brew Strength Settings
Many Russell Hobbs coffee makers offer adjustable brew strength settings‚ allowing you to customize your coffee’s flavor intensity. These settings typically range from mild to strong‚ influencing the extraction process and resulting cup profile.
The coffee strength is often controlled via dedicated buttons or a selector dial on the machine’s control panel. Selecting a stronger setting generally increases the brewing time or alters the water temperature‚ extracting more flavor compounds from the grounds.
Experiment with different settings to find your preferred strength. Remember that the type of coffee grounds used also significantly impacts the final taste. Consult your specific model’s manual for detailed instructions on adjusting these settings effectively.
Cleaning and Maintenance
Regular cleaning is crucial for maintaining your Russell Hobbs coffee maker’s performance and longevity. Consistent upkeep prevents mineral buildup and ensures optimal brewing quality. Daily cleaning should involve rinsing the carafe‚ filter basket‚ and any removable parts with warm‚ soapy water after each use.

Avoid abrasive cleaners or scouring pads‚ as these can damage the surfaces. Periodically‚ a more thorough cleaning is necessary‚ including descaling to remove calcium deposits. Refer to your model’s manual for specific descaling instructions and recommended solutions.
Proper maintenance extends the life of your appliance and guarantees consistently delicious coffee. Always unplug the coffee maker before cleaning.
Descaling Your Coffee Maker
Descaling removes mineral buildup‚ primarily calcium‚ that accumulates over time‚ impacting brewing performance and coffee taste. The frequency of descaling depends on water hardness; more frequent descaling is needed with hard water. Use a commercially available descaling solution specifically designed for coffee makers‚ or a mixture of white vinegar and water.
Follow the instructions in your model’s manual carefully. Typically‚ you’ll run the descaling solution through a full brewing cycle‚ followed by several cycles with fresh water to rinse thoroughly. Never use abrasive cleaners.
Regular descaling ensures optimal operation and prolongs the lifespan of your Russell Hobbs coffee maker‚ delivering consistently flavorful coffee;
Cleaning the Carafe and Filter Basket
Regular cleaning of the carafe and filter basket is crucial for maintaining coffee quality and hygiene; After each use‚ discard used coffee grounds and rinse both components with warm‚ soapy water. Avoid abrasive cleaners or scouring pads‚ as these can damage the surfaces.
The carafe is often dishwasher safe (check your model’s manual for confirmation)‚ but hand washing is recommended to preserve its clarity. The filter basket can also typically be washed in the dishwasher or by hand. Ensure all soap residue is removed before reassembling.
Periodic deep cleaning with a mild descaling solution can help remove stubborn stains and buildup‚ ensuring optimal performance.
Troubleshooting Common Issues
If your Russell Hobbs coffee maker isn’t turning on‚ first verify the power cord is securely plugged into a working outlet. Check the fuse or circuit breaker. Slow brewing can indicate scale buildup; descaling is recommended. Ensure the water reservoir isn’t overfilled and the carafe is correctly positioned.
If the coffee maker stops mid-brew‚ press the power button to restart the cycle. Error messages may appear – consult your model’s specific manual for their meaning and resolution. Avoid using the microwave to reheat the carafe.
For persistent issues‚ refer to the warranty information for support options.
Coffee Maker Not Turning On
If your Russell Hobbs coffee maker fails to power on‚ the initial step is to confirm the power cord is firmly connected to a functioning electrical outlet. A simple check of the outlet with another device can quickly identify if the issue lies with the power source itself. Next‚ inspect your home’s circuit breaker or fuse box to ensure the circuit hasn’t tripped or the fuse hasn’t blown.
If the outlet and circuit are fine‚ there might be an internal issue with the coffee maker. Do not attempt to disassemble the unit yourself; contact customer support. Ensure the coffee maker is properly assembled‚ as some models have safety mechanisms preventing operation if components aren’t correctly in place.
Coffee Brewing Too Slowly
If your Russell Hobbs coffee maker is brewing exceptionally slowly‚ the most common cause is mineral buildup‚ requiring descaling. Scale restricts water flow‚ significantly extending the brewing time. Refer to the ‘Descaling Your Coffee Maker’ section for detailed instructions on this process. Another potential issue is using coffee grounds that are ground too finely; this can clog the filter.
Ensure you’re using a medium grind specifically recommended for drip coffee makers. Also‚ verify the filter basket isn’t overfilled‚ as this can also impede water flow. If the problem persists after descaling and adjusting the grind size‚ contact customer support for further assistance‚ as it could indicate a more serious internal issue.
Safety Precautions
Prior to operating your Russell Hobbs coffee maker‚ carefully read all included instructions‚ cautions‚ and warnings. Always ensure the appliance is placed on a stable‚ level surface. Never immerse the coffee maker base in water or any other liquid to prevent electrical shock. Avoid operating the appliance with a damaged cord or plug; seek professional repair.
Do not use the coffee maker outdoors. Keep the appliance out of reach of children. Always allow the coffee maker to cool completely before cleaning. Never operate the appliance without water in the reservoir. Be cautious of hot surfaces and steam during and after brewing to avoid burns and scalds.
Electrical Safety Guidelines

To ensure safe operation‚ always check that your mains voltage corresponds to the voltage marked on the appliance. Never operate the Russell Hobbs coffee maker with an extension cord unless absolutely necessary and it is appropriately rated for the appliance’s wattage. Avoid using adapters as they may pose a safety risk.
Regularly inspect the power cord for damage and discontinue use if any damage is detected. Do not attempt to repair the appliance yourself; contact qualified service personnel for any repairs. Always unplug the coffee maker from the electrical outlet when not in use and before cleaning. Ensure hands are dry before handling the plug or appliance.

Avoiding Burns and Scalds
Exercise extreme caution when handling hot coffee and steam. The carafe and surrounding areas become hot during and after brewing; always use the handle or a pot holder when handling the carafe. Avoid touching hot surfaces‚ including the warming plate and steam vents.
Keep children away from the coffee maker during operation and immediately after brewing‚ as surfaces remain hot for a considerable time. Do not attempt to open the lid during the brewing cycle to prevent steam burns. Never pour hot coffee towards yourself or others‚ and be mindful of the hot steam released during operation. Ensure the appliance is stable and on a heat-resistant surface.
Frequently Asked Questions (FAQ)
Q: How do I reset the clock? Press and hold the ‘Hour’ and ‘Minute’ buttons simultaneously until the clock display begins to flash‚ then use the buttons to set the correct time. Q: What if an error message appears? Refer to the specific error code in the manual for troubleshooting steps; unplugging and replugging may sometimes resolve minor issues.
Q: Can I use any type of coffee filter? Generally‚ paper filters are recommended‚ but reusable filters can be used if compatible with your model. Q: Why is my coffee weak? Use more coffee grounds or select a stronger brew setting. Q: How often should I descale the coffee maker? Descale every 3-6 months‚ depending on water hardness.
Resetting the Clock
To reset the clock on your Russell Hobbs coffee maker‚ locate the ‘Hour’ and ‘Minute’ buttons. Press and hold both buttons simultaneously for a few seconds until the time display begins to flash. This indicates the clock is in setting mode. Use the ‘Hour’ button to adjust the hour and the ‘Minute’ button to adjust the minutes.
Ensure you set the correct AM or PM time‚ as many models operate on a 24-hour clock. If you don’t press either button within five seconds‚ the coffee maker will automatically revert to its previous time setting. Confirm the correct time is displayed before releasing the buttons.
Dealing with Error Messages
If your Russell Hobbs coffee maker displays an error message‚ consult the specific manual for your model number‚ as codes vary. Common issues include ‘Error 1’ indicating a descaling need‚ or a flashing light signaling a water reservoir problem. First‚ ensure the water reservoir is correctly inserted and filled to the minimum level.
If the error persists‚ try unplugging the coffee maker for a few minutes‚ then plugging it back in to reset the system. If the message continues‚ descaling may be necessary. Refer to the ‘Descaling Your Coffee Maker’ section for detailed instructions. If none of these steps resolve the issue‚ contact Russell Hobbs customer support.
Warranty Information and Support
Russell Hobbs coffee makers typically come with a standard one-year manufacturer’s warranty‚ covering defects in materials and workmanship. This warranty doesn’t cover damage from misuse‚ accidents‚ or improper cleaning. To make a warranty claim‚ retain your proof of purchase and contact Russell Hobbs customer support through their official website or helpline.
For additional support‚ including frequently asked questions‚ troubleshooting guides‚ and downloadable manuals‚ visit the Russell Hobbs website. You can also find helpful resources and connect with other users through online forums and communities. Ensure you have your model number readily available when seeking assistance.