Grohe Thermostatic Shower Valve Manual: A Comprehensive Guide
This manual details installation, operation, maintenance, and troubleshooting for GROHE Grohtherm valves, ensuring optimal performance and safety within your bathroom environment.
Understanding Grohe Thermostatic Shower Valves
Grohe thermostatic shower valves are engineered to deliver a consistently comfortable and safe showering experience by maintaining a pre-set water temperature, regardless of fluctuations in hot or cold water supply pressure. Unlike traditional mixing valves, these valves utilize a thermostatic cartridge to blend hot and cold water, ensuring a stable temperature even when other water sources in the home are in use.
These valves offer precise temperature control, preventing scalding and providing peace of mind, especially for families with children or elderly individuals. Grohe’s advanced technology ensures rapid responsiveness to temperature changes, delivering immediate and reliable performance. Understanding the core function of the thermostatic cartridge is key to proper maintenance and troubleshooting, as it’s often the source of issues like inconsistent temperature or insufficient hot water.
Key Features and Benefits
Grohe thermostatic shower valves boast several key features, including precise temperature control, scalding protection, and consistent water flow, even with varying water pressure. The Grohtherm series offers rapid responsiveness, quickly adjusting to desired temperatures. Installation is streamlined, and the valves are designed for longevity and durability, utilizing high-quality materials.
Benefits include enhanced safety, particularly for vulnerable users, and a luxurious showering experience. Users appreciate the ease of use and reliable performance. Grohe’s SmartControl options provide added convenience with multiple spray patterns and intuitive operation. Furthermore, the valves contribute to water conservation by minimizing temperature adjustments and wasted water, offering both comfort and efficiency.
Grohe Grohtherm 1000 Series: Overview
The Grohe Grohtherm 1000 series represents a cornerstone of thermostatic shower technology, known for its reliability and precision. This series typically features a durable brass valve body and a compact design suitable for various bathroom configurations. It offers a consistent water temperature, preventing sudden fluctuations and ensuring a comfortable showering experience.
Models within the 1000 series often include a temperature limiter, enhancing safety, and a smooth, responsive control knob. The Grohtherm 1000 is compatible with various shower heads and can be integrated into both concealed and exposed installations. It’s a popular choice for both residential and commercial applications, valued for its long-lasting performance and ease of maintenance.
Safety Precautions Before Installation
Prior to installing your Grohe thermostatic shower valve, crucial safety steps must be observed. First and foremost, always shut off the main water supply to prevent flooding and potential damage. Ensure the electrical power to the bathroom is also disconnected to avoid electrical hazards during the process. Wear appropriate safety glasses to protect your eyes from debris.
Inspect all components for damage before beginning installation; do not use damaged parts. Familiarize yourself with local plumbing codes and regulations to ensure compliance. If you are uncomfortable with any aspect of the installation, consult a qualified plumber. Proper installation is vital for safe and reliable operation, preventing leaks and scalding risks.
Installation Process: Step-by-Step
The installation requires careful execution for optimal performance. Begin by thoroughly reading all instructions and verifying all necessary components are present. The process involves several key stages: shutting off the water supply, carefully removing existing fixtures, and then precisely installing the new valve body.
Next, connect the water lines, ensuring tight and secure fittings to prevent leaks. Double-check all connections before restoring water flow. Proper alignment is critical during valve body installation to guarantee smooth operation. Following these steps diligently will result in a correctly installed and functioning Grohe thermostatic shower valve, providing years of reliable service.
Shutting Off Water Supply
Before commencing any installation work, completely shut off the water supply. Locate the main water shut-off valve for your bathroom or the entire house. Turn it clockwise until fully closed. To ensure complete isolation, open the existing shower faucet to relieve any remaining water pressure within the pipes.
This step is crucial for preventing water damage and ensuring a safe working environment. Verify the water is indeed off by briefly attempting to turn on the shower faucet again. If water continues to flow, re-check the shut-off valve and address any issues before proceeding. A dry work area is essential for a successful installation.
Removing Existing Fixtures
Carefully remove the existing shower fixtures, including the handle, escutcheon plate, and valve body. Use appropriate tools to avoid damaging the surrounding tile or plumbing. A basin wrench can be particularly useful for loosening tight connections. Protect the shower wall surface with a cloth or cardboard to prevent scratches during removal.
Inspect the existing plumbing connections for any signs of corrosion or damage. If necessary, address these issues before installing the new Grohe thermostatic valve. Thoroughly clean the shower wall surface, removing any old sealant or debris. Ensure the area is dry and prepared for the new valve installation.
Installing the Valve Body
Carefully insert the Grohe valve body into the shower opening, ensuring it’s properly aligned with the water supply lines. Apply plumber’s tape to the threads of the water connections to create a watertight seal. Gently tighten the valve body into place, avoiding excessive force that could damage the unit or surrounding wall.
Verify the valve body is flush against the wall surface and securely mounted. Use a level to confirm it’s perfectly vertical. Double-check all connections for tightness and proper alignment before proceeding. This step is crucial for preventing leaks and ensuring optimal performance of the thermostatic shower valve.
Connecting Water Lines
Attach the hot and cold water supply lines to the corresponding inlets on the Grohe valve body, ensuring a secure and watertight connection. Use appropriate fittings and apply plumber’s tape to all threaded connections. Carefully tighten the connections, avoiding over-tightening which could damage the valve or pipes.
Double-check the hot and cold water line connections to confirm they are correctly installed and securely fastened. A reversed connection will result in improper temperature control. Once connected, slowly turn on the water supply to check for any leaks around the connections. Address any leaks immediately before proceeding with the installation.
Cartridge Adjustment and Replacement
The Grohe thermostatic cartridge, often model 47111000, is crucial for temperature control. If experiencing issues like inconsistent temperatures, adjustment or replacement may be necessary. Begin by identifying the correct cartridge for your Grohe model. To adjust the temperature limiter, remove the handle and decorative cap to access the adjustment ring.
Rotate the limiter ring clockwise to increase the maximum hot water temperature, and counterclockwise to decrease it. For a faulty cartridge, shut off the water supply, remove the handle and trim, then extract the old cartridge. Install the new cartridge, ensuring proper alignment, and reassemble the valve.
Identifying the Cartridge (e.g., 47111000)
Accurate cartridge identification is vital for successful replacement. Grohe utilizes various cartridge models depending on the valve series. A common cartridge is the 47111000, frequently found in Grohtherm 1000 series valves, but always verify compatibility with your specific model. Examine the existing cartridge carefully before removal, noting any markings or numbers present.
Consult your valve’s documentation or the Grohe website using the valve’s product code to confirm the correct replacement part. Incorrect cartridges will not function properly and may damage the valve body. Ensure the new cartridge matches the old one in terms of shape, size, and connection type for a seamless installation.
Adjusting Temperature Limiter
The temperature limiter prevents scalding by restricting maximum hot water output. To adjust, remove the handle and decorative cap, exposing the limiter ring. Rotate the ring clockwise to increase the maximum hot water temperature, and counterclockwise to decrease it. Exercise caution during adjustment; small rotations significantly impact temperature.
Always test the adjusted temperature with a thermometer to ensure it’s safe and comfortable. Consider household members, especially children and the elderly, when setting the limit. Grohe recommends a maximum temperature of 49°C (120°F) to prevent burns. Reinstall the cap and handle after adjustment, verifying secure placement and proper operation.
Replacing a Faulty Cartridge
A failing cartridge often causes inconsistent temperatures or insufficient hot water. Begin by shutting off the water supply and removing the handle, escutcheon, and retaining nut. Gently pull the old cartridge straight out; some models may require a special removal tool. Inspect the valve body for debris before inserting the new cartridge.
Ensure the new cartridge (e.g., 47111000) is correctly oriented, aligning any markings as indicated in the installation guide. Push firmly until fully seated, then reinstall the retaining nut, escutcheon, and handle. Restore water supply and test thoroughly for leaks and proper temperature control. A properly replaced cartridge restores optimal valve function.
Troubleshooting Common Issues
Several issues can arise with Grohe thermostatic valves. Insufficient hot water often points to a faulty cartridge or plumbing restrictions. Inconsistent temperature control can also stem from a cartridge issue, or a partially blocked water line. If the valve dispenses only hot or cold water, check for reversed connections or a malfunctioning cartridge – this indicates a mixing problem.
Always verify water pressure and supply lines. If problems persist, carefully inspect the temperature limiter and cartridge for damage or debris. Consult the manual for specific error codes or diagrams. Proper diagnosis and repair restore safe and consistent shower performance.
Insufficient Hot Water
Limited hot water from your Grohe valve often indicates a problem with the thermostatic cartridge. A common cause is scale buildup restricting hot water flow, or a failing cartridge unable to properly mix temperatures. Check your hot water heater’s temperature setting; it may be set too low. Examine the hot water supply line for kinks or obstructions, reducing pressure.
To address this, try adjusting the cartridge’s temperature limiter (refer to the cartridge adjustment section). If the issue persists, cartridge replacement is usually necessary. Ensure proper water pressure and consider flushing the hot water lines to remove potential sediment buildup.
Inconsistent Temperature Control
Fluctuating water temperatures with your Grohe thermostatic valve frequently point to a faulty or worn thermostatic cartridge. Scale deposits within the cartridge can disrupt its ability to accurately blend hot and cold water, leading to temperature swings. Air pockets in the lines can also contribute to instability.
Begin by checking for airlocks by running other hot water faucets. If the problem continues, adjust or replace the cartridge, following the detailed instructions provided in the cartridge section of this manual. Ensure the temperature limiter is correctly set. A failing cartridge is the most likely culprit for inconsistent temperature delivery.
Valve Dispensing Only Hot or Cold Water
If your Grohe thermostatic valve delivers exclusively hot or cold water, with no mixing occurring, a plumbing issue or a faulty cartridge is suspected. First, verify that both hot and cold water supplies are fully turned on to the valve. Reversed plumbing connections – hot to cold and vice versa – are a common cause.
If the plumbing is correct, the thermostatic cartridge is likely defective and requires replacement. Scale buildup or internal damage can prevent the cartridge from blending the water properly. Carefully follow the cartridge replacement instructions. Ensure the cartridge is correctly seated during installation to restore proper mixing functionality.
Grohe SmartControl Triple Function Valve Trim (29138000)
The GROHE Grohtherm SmartControl Triple Function Thermostatic Valve Trim (29138000) offers a sophisticated showering experience, allowing control of up to three separate outlets – like a showerhead, hand shower, and body sprays – from a single, intuitive interface. This wall-mounted trim features a sleek silver finish and is designed for use with compatible Grohe thermostatic valve bodies.
SmartControl utilizes GROHE’s TurboStat technology for incredibly precise and consistent temperature control. The trim’s ergonomic design and ‘Push & Turn’ functionality provide effortless operation. It’s a premium upgrade for those seeking a modern, customizable, and high-performance shower system.
Maintenance and Cleaning
Regular maintenance ensures the longevity and optimal performance of your Grohe thermostatic shower valve. To clean, use a mild detergent and soft cloth; avoid abrasive cleaners, scouring pads, or solvents as these can damage the finish. Periodically check for leaks around the valve and connections, addressing any issues promptly.
Descaling is crucial, especially in areas with hard water. Follow Grohe’s descaling recommendations to prevent mineral buildup within the valve and cartridge. Inspect the shower head (like the RELEXA 100) for blockages and clean spray nozzles regularly. Proper care will maintain the valve’s functionality and aesthetic appeal for years to come.
RELEXA 100 Shower Head Compatibility
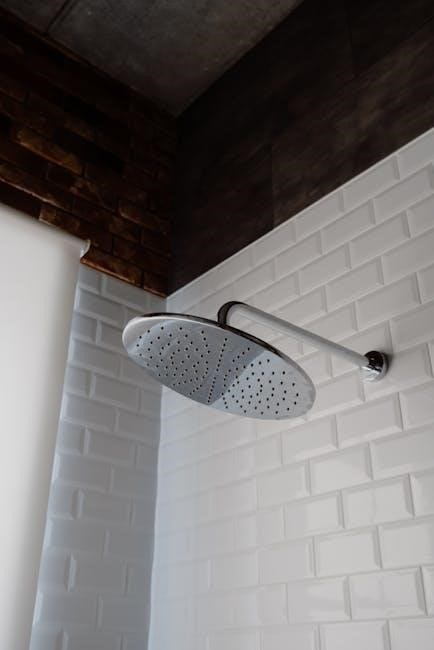
The Grohe RELEXA 100 shower head is designed for seamless compatibility with Grohe thermostatic shower valves, enhancing your showering experience with its five adjustable spray patterns. Featuring a ball-joint design, it allows for flexible positioning and optimal spray coverage. The RELEXA 100 connects via a standard 1/2 NPT female thread, ensuring easy installation with most Grohe valve setups.
This shower head’s design complements the precision temperature control of Grohe valves, delivering a consistently comfortable and enjoyable shower. Its durable construction and high-quality materials guarantee long-lasting performance. Enjoy the versatility and luxurious feel of the RELEXA 100 paired with your Grohe thermostatic system;