Geevon Weather Station Manual: A Comprehensive Guide
Discover a detailed resource for your Geevon weather station (models 208665, 246275, CA-25146VA, 208667). This manual provides setup, operation, and troubleshooting guidance for accurate temperature and humidity monitoring.

Welcome to the world of comprehensive home environmental monitoring with your new Geevon Wireless Weather Station! This advanced device, available in various models including 208665, 246275, CA-25146VA, and 208667, is designed to provide accurate, real-time data regarding both indoor and outdoor conditions. Whether you’re a gardening enthusiast, a health-conscious individual, or simply someone who appreciates knowing the climate around them, the Geevon weather station offers a user-friendly solution.
This station isn’t just a thermometer and hygrometer; it’s a complete system for tracking temperature and humidity trends, setting personalized alerts for extreme conditions, and even predicting future weather patterns. The large, color display ensures easy readability, while adjustable brightness caters to different lighting environments. It’s built for ease of use, offering a seamless experience from initial setup to daily monitoring. This manual will guide you through every step, ensuring you maximize the benefits of your Geevon weather station and enjoy a comfortable, informed living environment. Explore the features and unlock the full potential of your new device!
Understanding the Package Contents
Before you begin setting up your Geevon Weather Station (models 208665, 246275, CA-25146VA, 208667), it’s crucial to verify that all components are present. Your package should include the main indoor unit, featuring a color display and intuitive controls. Additionally, you’ll find the outdoor sensor, responsible for transmitting external temperature and humidity data wirelessly.
Carefully unpack and inspect the following items: the indoor unit itself, the remote outdoor sensor (TX19-WHITE for replacements), and this comprehensive user manual to guide you through the setup process. Depending on the model, you may also receive a USB charging cable for powering the indoor unit, eliminating the need for frequent battery replacements. Please note that batteries – typically 2 AAA batteries for the outdoor sensor – are often not included and must be purchased separately. Ensure no items are missing or damaged. If anything is absent or appears faulty, contact customer support immediately for assistance before proceeding with installation. Proper inventory ensures a smooth setup experience.
Device Overview: Indoor and Outdoor Units
The Geevon Weather Station comprises two primary units: the indoor console and the outdoor sensor. The indoor unit boasts a large, 7.5-inch VA (Visual Angle) color display, designed for clear readability from various angles and distances. This display presents real-time data including indoor and outdoor temperature, humidity levels, weather forecasts, and time/date information. Touch keys facilitate easy navigation and settings adjustments.

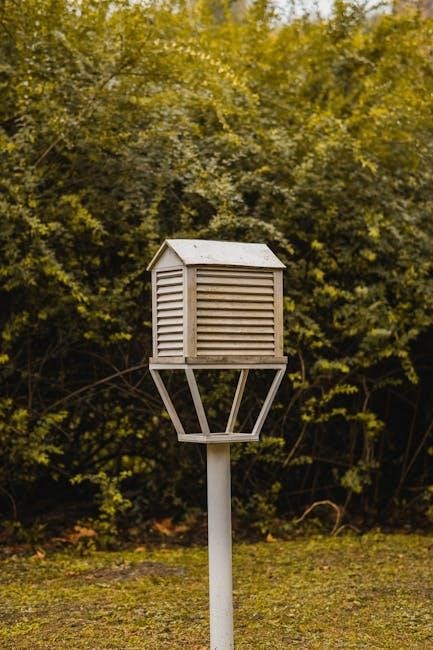
The outdoor sensor, typically designated TX19-WHITE when purchased as a replacement, is engineered for robust outdoor performance. It continuously measures external temperature and humidity, transmitting this data wirelessly to the indoor console. The sensor is designed to be weather-resistant, but proper placement is crucial to avoid direct exposure to extreme conditions. Both units are designed for user-friendliness, with the indoor console offering adjustable brightness levels for optimal viewing in different lighting environments. The combined functionality provides a comprehensive environmental monitoring solution for your home or garden.
Initial Setup and Battery Installation
To begin using your Geevon Weather Station, proper setup and battery installation are essential. First, unpack all components and verify that you have both the indoor console and the outdoor sensor. For the indoor console, locate the battery compartment – typically on the rear of the unit – and insert 2 AAA batteries (not included). Ensure correct polarity as indicated inside the compartment.
Next, install batteries into the outdoor sensor. The number and type of batteries required may vary, but generally, it also uses AAA batteries. After battery installation, the outdoor sensor will automatically begin transmitting data. The indoor console should automatically detect the signal. If it doesn’t, refer to the ‘Wireless Sensor Pairing’ section. It’s recommended to position the outdoor sensor in a shaded, well-ventilated area, away from direct sunlight and rain. Proper battery installation and sensor placement are crucial for accurate readings and reliable operation.
Display Features and Icons Explained

The Geevon Weather Station boasts a large, color VA display providing at-a-glance information. The primary screen showcases indoor and outdoor temperature readings, alongside humidity levels. Trend indicators – arrows pointing up, down, or remaining static – illustrate whether temperature and humidity are rising, falling, or stable. Max/Min records display the highest and lowest readings recorded since the last reset.
A comfort indicator visually represents the current indoor comfort level. Weather forecast icons predict upcoming conditions, utilizing a range of symbols for sunny, cloudy, rainy, and snowy weather. The display also features icons for low battery levels, signal reception strength, and alert status. Adjustable brightness levels ensure optimal visibility in various lighting conditions. Familiarizing yourself with these display features and icons is key to effectively interpreting the data provided by your Geevon Weather Station and understanding your environment.
Setting the Time and Date
Accurate time and date settings are crucial for correct weather forecasting and data logging. Upon initial setup, or after replacing batteries, the time and date must be configured. Typically, this is achieved through dedicated buttons on the indoor unit – often labeled ‘Mode’, ‘Set’, or similar. Pressing and holding the ‘Set’ button usually enters the setting mode.
Subsequently, use the ‘Mode’ button to cycle through the year, month, day, hour, and minute fields. Within each field, utilize the up and down arrow buttons to adjust the values. Confirm each selection by pressing ‘Set’ again. Some models may offer a 12/24-hour time format option, accessible within the settings menu. Ensure the correct time zone is selected for accurate weather predictions. Refer to the specific model’s instructions, as button functions can vary slightly. Proper time and date configuration ensures reliable operation of all station features.
Configuring Temperature Units (°F/°C)
The Geevon weather station allows you to display temperatures in either Fahrenheit (°F) or Celsius (°C) to suit your preference. Accessing this setting typically involves navigating through the station’s menu system using the ‘Set’ and ‘Mode’ buttons, similar to setting the time and date. After entering the settings mode, cycle through the options until you locate the temperature unit selection.
Once highlighted, use the up or down arrow buttons to toggle between °F and °C. Confirm your selection by pressing the ‘Set’ button. The display will immediately reflect the chosen unit. This setting affects both indoor and outdoor temperature readings, as well as the high/low temperature alerts. Remember to note your chosen unit for accurate interpretation of the data. Some models might require a brief press of a dedicated ‘°F/°C’ button for quick switching. Always consult your specific model’s manual for precise instructions.
Wireless Sensor Pairing and Range
Establishing a connection between the outdoor sensor and the indoor display unit is crucial for accurate remote temperature and humidity readings. Initially, ensure both units are within close proximity – ideally, within a few feet – during the pairing process. Typically, this involves pressing a ‘Sensor’ or ‘Pair’ button on both the indoor console and the outdoor sensor simultaneously. The console will then begin searching for the sensor’s signal.

Successful pairing is usually indicated by a stable outdoor temperature reading on the display. The effective wireless range is approximately 197 feet (60 meters) in open areas. However, obstacles like walls, floors, and electronic interference can significantly reduce this range. If the connection is lost, try moving the sensor closer to the console or replacing the batteries in both units. Avoid placing the sensor near sources of interference, such as microwaves or Wi-Fi routers, to maintain a reliable signal;
Monitoring Indoor Temperature and Humidity

The Geevon weather station continuously monitors and displays the indoor temperature and humidity levels on the main color display. These readings are essential for maintaining a comfortable and healthy living environment within your home. The station provides current readings, as well as 24-hour maximum and minimum records, allowing you to track fluctuations throughout the day.
Pay attention to the comfort indicator, which visually represents the current indoor conditions – typically displayed as icons indicating ‘Dry’, ‘Comfortable’, or ‘Wet’. This feature offers a quick assessment of the air quality. Regularly checking these readings can help you adjust your home’s heating, ventilation, and air conditioning systems to optimize comfort and prevent issues related to excessively dry or humid air. The large, easy-to-read display ensures effortless monitoring at a glance, contributing to a healthier indoor climate.
Monitoring Outdoor Temperature and Humidity
To accurately monitor outdoor conditions, the Geevon weather station utilizes a wireless outdoor sensor. This sensor transmits temperature and humidity data back to the indoor unit, providing real-time information without requiring direct access to the outside. Ensure the sensor is placed in a shaded, well-ventilated area, away from direct sunlight and rain exposure, for the most reliable readings.
Like indoor readings, the station displays current outdoor temperature and humidity, alongside 24-hour maximum and minimum records. This allows you to track changes in external conditions and anticipate potential weather shifts. Regularly monitoring outdoor data is crucial for planning outdoor activities, protecting sensitive plants, and understanding the overall climate trends in your area. Proper sensor placement and consistent monitoring contribute to a comprehensive understanding of your local weather patterns, enhancing your ability to prepare for varying conditions.
Understanding Weather Forecast Predictions

The Geevon weather station provides a forecast prediction feature, utilizing atmospheric pressure changes to anticipate upcoming weather conditions. This isn’t a long-range forecast, but rather a localized, short-term prediction based on immediate environmental shifts. The station displays weather icons representing sunny, partly cloudy, cloudy, rainy, or stormy conditions.
It’s important to understand that these predictions are estimates and should be used as a general guide, not a definitive forecast. Accuracy depends on stable atmospheric conditions and proper station setup. Significant or rapid weather system changes may not be accurately predicted. The station analyzes barometric pressure trends; a falling pressure often indicates approaching inclement weather, while rising pressure suggests improving conditions. Combine the station’s forecast with reliable external weather sources for a more comprehensive understanding of the expected weather patterns in your area.
Setting High/Low Alerts
The Geevon weather station allows you to set custom high and low temperature and humidity alerts. This feature notifies you when conditions exceed your pre-defined comfort levels. To configure these alerts, navigate to the settings menu using the station’s buttons. You’ll be prompted to enter your desired high and low temperature thresholds, both in Fahrenheit or Celsius, depending on your chosen unit setting.

Similarly, you can set high and low humidity alert levels. When the indoor or outdoor temperature or humidity falls outside your specified range, the station will typically emit an audible alarm or display a visual indicator. This is incredibly useful for monitoring sensitive environments, protecting plants, or ensuring comfortable living conditions. Remember to test your alert settings after configuration to confirm they function as expected; Adjust the thresholds as needed to suit your specific requirements and preferences.
Adjusting Display Brightness
The Geevon weather station features an adjustable display brightness setting, allowing you to optimize visibility in various lighting conditions. This is particularly useful for nighttime viewing, preventing the display from being too intrusive, or ensuring readability in bright sunlight. To adjust the brightness, locate the dedicated “Brightness” or “Backlight” button on the station’s housing – often indicated by a sun icon.
Pressing this button typically cycles through several brightness levels: high, medium, low, and off. Some models, like the 208667, offer a 3-level adjustable brightness. Experiment with each level to find the setting that best suits your environment and personal preference. A lower brightness setting conserves battery life, while a higher setting provides maximum clarity. The upgraded 7.5-inch VA display benefits greatly from this adjustment, ensuring comfortable viewing at any time of day or night. Remember to check the user manual for specific button locations and operation details for your particular model.
Troubleshooting Common Issues
If your Geevon weather station isn’t functioning as expected, several common issues can be easily resolved. A frequent problem is a loss of signal between the indoor and outdoor sensors. Ensure the sensors are within range (refer to the ‘Wireless Sensor Pairing and Range’ section) and that there are no significant obstructions. Replace the batteries in both units, as low battery power can cause intermittent readings or signal loss.
Incorrect temperature readings can often be traced to improper sensor placement – avoid direct sunlight or heat sources. If the display is blank, verify the power source and battery installation. For forecast inaccuracies, ensure the station is properly set up with the correct time and date. If issues persist, consult the comprehensive user manual for model-specific troubleshooting steps. Remember to check for updated firmware or FAQs on the Geevon website. Contacting customer support is also an option for more complex problems, providing your model number (TX19-WHITE, or 208665, etc.) for efficient assistance.
Maintenance and Cleaning
To ensure the longevity and accuracy of your Geevon weather station, regular maintenance is recommended. The indoor and outdoor units should be cleaned periodically with a soft, damp cloth. Avoid using abrasive cleaners or solvents, as these can damage the sensors or display. Do not immerse the units in water.

Inspect the outdoor sensor regularly for debris buildup, such as leaves or dust, which can obstruct airflow and affect temperature/humidity readings. Replace batteries in both the indoor display and outdoor sensor at least once a year, or when low battery indicators appear. Proper battery disposal is essential; follow local regulations. Avoid exposing the station to extreme temperatures or humidity for prolonged periods. The VA display can be gently wiped clean, but avoid excessive pressure. Refer to the full user manual (models 208665, 246275, CA-25146VA, 208667) for detailed cleaning instructions and preventative measures to maintain optimal performance.
Specifications and Technical Details (Model Numbers: 208665, 246275, CA-25146VA, 208667)
Geevon weather stations boast a 7.5-inch VA display for clear readability. The TX19-WHITE outdoor sensor requires 2 AAA batteries (not included). Indoor units operate on batteries or USB power, featuring a USB charging port on some models. Wireless range extends up to 197 feet (60 meters) in open areas.
Temperature range for both indoor and outdoor units is typically 32°F to 140°F (0°C to 60°C). Humidity measurement range is 20% to 99%. Models 208665 and 246275 offer weather forecasting, while all models provide max/min temperature records and high/low alerts. The display features adjustable brightness levels. The station monitors indoor/outdoor temperature and humidity with trend indicators. Dimensions and weight vary slightly between models. Detailed specifications, including power consumption and sensor accuracy, are available in the comprehensive user manual for each specific model number (208665, 246275, CA-25146VA, 208667).