Craftsman Leaf Blower/Vacuum: A Comprehensive Guide
This guide details safe operation and maintenance for Craftsman models CMXEVBE176060/CMXEVBE176070, offering versatile wet/dry vacuum and detachable leaf blower functionality.
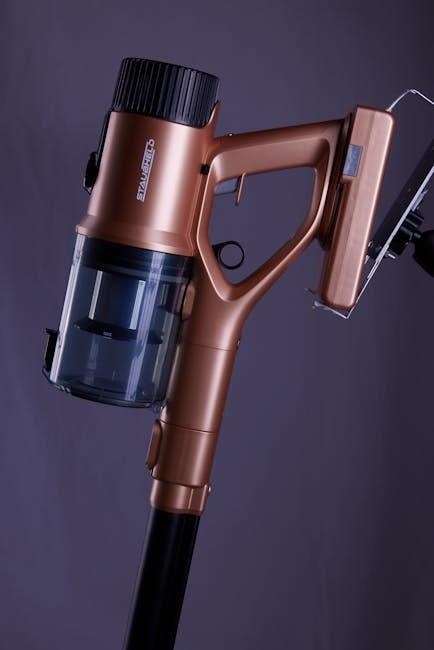
Craftsman leaf blowers and vacuums represent a commitment to powerful, versatile lawn care solutions for homeowners. These tools, like the CMXEVBE176060 and CMXEVBE176070 models, seamlessly transition between blowing and vacuuming functions, simplifying yard cleanup. Available in both 12 and 16-gallon capacities, they cater to diverse needs.
Designed for ease of use, Craftsman prioritizes features like translucent fuel tanks and variable speed control with cruise control. The comfort-molded handle minimizes vibration, enhancing user comfort during extended operation. This comprehensive guide provides detailed instructions for assembly, operation, maintenance, and troubleshooting, ensuring optimal performance and longevity of your Craftsman equipment.
Understanding Your Model Number (CMXEVBE176060/CMXEVBE176070)
Your Craftsman leaf blower/vacuum’s model number – CMXEVBE176060 or CMXEVBE176070 – is crucial for accessing specific support and parts information. This number identifies the exact configuration of your unit, including capacity (12 or 16 gallons) and features.
Referencing this number when ordering replacement parts, like the impeller housing or vacuum door spring (parts 28 & 29), ensures compatibility. It’s also essential when downloading the operating manual or seeking assistance from Craftsman customer service. Locate the model number on the product label for accurate identification and streamlined maintenance.
Safety Precautions
Prioritize safety when operating your Craftsman leaf blower/vacuum. Always read the complete owner’s manual before use, paying close attention to all warnings and instructions. Wear appropriate safety glasses and dust masks to protect against debris. Keep bystanders, especially children and pets, a safe distance away during operation.
Never operate the blower/vacuum with a damaged cord or if it’s malfunctioning. Ensure proper ventilation when using indoors. Be mindful of surrounding objects and avoid directing the blower at people or fragile items. Disconnect the power source before performing any maintenance or changing attachments.
General Safety Rules
Always inspect the equipment before each use, ensuring all parts are securely attached and in good working condition. Never modify the leaf blower/vacuum or use it for purposes not intended by the manufacturer. Maintain a firm grip on the handles during operation, and be aware of your surroundings at all times.
Avoid operating the machine in wet conditions or near flammable materials. Do not attempt to collect hot or burning objects. Store the leaf blower/vacuum in a dry, secure location out of reach of children. Follow all local ordinances regarding noise levels and operating hours.

Specific Safety Warnings for Leaf Blowers
Direct the blower outlet away from people, animals, and fragile objects. Avoid blowing debris towards roadways or creating dust clouds that could obstruct visibility. Wear appropriate eye and hearing protection during operation, as leaf blowers can generate significant noise and propel debris at high speeds.
Be mindful of potential hazards hidden in debris, such as rocks or glass. Never use the leaf blower in areas where there is a risk of electrical shock. Ensure proper ventilation when using the blower indoors or in enclosed spaces. Regularly inspect the blower tube for damage.
Specific Safety Warnings for Vacuums
Never operate the vacuum without a bag or filter installed, as this could damage the machine and create a hazardous dust cloud. Avoid vacuuming flammable liquids or combustible materials. Do not use the vacuum to pick up sharp objects, such as nails or broken glass, that could puncture the bag or hose.
Always disconnect the power source before emptying the collection bag or performing any maintenance. Be aware of potential electrical hazards when vacuuming in wet conditions. Regularly inspect the vacuum hose and connections for damage or blockages. Ensure the vacuum is stable and secure during operation.

Assembly Instructions
Proper assembly is crucial for optimal performance. This involves securely attaching the blower tube, connecting the vacuum components, and installing the concentrator nozzle.
Attaching the Blower Tube
Begin by aligning the blower tube with the designated port on the main blower unit. Ensure a firm and secure connection to prevent detachment during operation. Rotate the tube clockwise until it locks into place, indicated by an audible click or a visual marker.
Verify the tube is properly seated and doesn’t wobble. A loose connection can reduce blowing efficiency and potentially create a safety hazard. The included blower tube is designed for optimal airflow and directional control, maximizing debris removal. Regularly inspect the connection before each use to maintain peak performance and safe operation of your Craftsman leaf blower.
Connecting the Vacuum Tube and Hose
To convert to vacuum mode, first securely attach the vacuum tube to the blower unit’s intake port. Rotate until it locks, similar to the blower tube attachment. Next, connect the flexible vacuum hose to the vacuum tube’s opposite end, ensuring a tight seal to prevent suction loss.
Double-check all connections before operation. A properly connected hose and tube are crucial for efficient debris collection. The hose length allows for extended reach, while the vacuum tube directs airflow into the collection bag. Inspect for any cracks or damage before each use to maintain optimal vacuuming performance.
Installing the Concentrator Nozzle
The concentrator nozzle enhances blower performance by focusing the airflow into a smaller, more powerful stream. To install, simply slide the nozzle onto the end of the blower tube. Ensure it fits snugly and is securely in place before operation.
This nozzle is particularly useful for directing leaves and debris from tight spaces, such as gutters or under decks. It increases blowing velocity, making quick work of stubborn piles. Regularly check the nozzle for wear and tear, replacing it if necessary to maintain optimal blowing efficiency. Proper installation maximizes the blower’s effectiveness.

Operating Instructions ‒ Blower Mode
To start blowing, ensure the blower tube is securely attached. Utilize variable speed control for optimal performance, adjusting to debris type and conditions.
Starting the Leaf Blower
Before initiating the leaf blower, confirm the blower tube is firmly connected and secured. Ensure the vacuum bag is removed if it’s attached, as it will obstruct airflow. Locate the power switch, typically positioned on the handle, and set it to the ‘blower’ setting. For electric models, plug the blower into a grounded outlet. For gas-powered versions, prime the engine by pressing the primer bulb several times. Then, engage the choke, if equipped, and pull the starter cord with a firm, steady motion. Once the engine starts, gradually disengage the choke. Allow the blower to warm up briefly before use, and always maintain a safe distance from obstacles and bystanders.
Variable Speed Control & Cruise Control
Craftsman leaf blowers feature a variable speed control, allowing you to adjust airflow based on the task. A lower speed is ideal for delicate areas like flowerbeds, while a higher speed is suitable for clearing heavier debris. The variable speed throttle, often with a comfort overmold handle, provides precise control. Many models also include cruise control functionality. To engage cruise control, set the desired speed and press the cruise control button. This maintains a consistent airflow without continuously holding the throttle. To disengage, simply press the cruise control button again or squeeze the throttle.
Optimizing Blower Performance
To maximize blower effectiveness, work with the wind whenever possible, directing debris towards a desired collection point. Avoid blowing directly into strong headwinds. Utilize the concentrator nozzle for focused airflow, ideal for tight spaces or stubborn leaves. Regularly clear the blower tube of obstructions to maintain optimal suction and output. Ensure the impeller housing remains clean, as buildup reduces performance. For wet leaves, consider a lower speed to prevent clogging. Remember to always wear appropriate safety gear, including eye protection, when operating the leaf blower for efficient and safe debris removal.
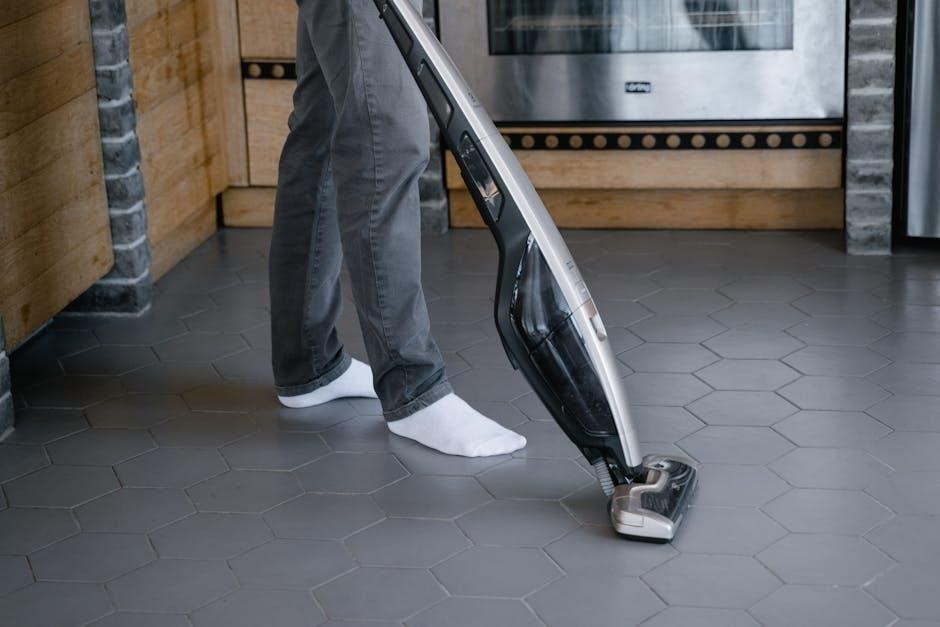
Operating Instructions ‒ Vacuum Mode
Convert the unit for vacuuming by attaching the vacuum tube and hose, ensuring a secure connection for efficient leaf and debris collection.
Converting to Vacuum Mode
Transitioning from blower to vacuum mode requires a few simple steps. First, disconnect the blower tube. Then, securely attach the vacuum tube to the designated port on the blower housing. Following this, connect the vacuum hose to the vacuum tube, ensuring a tight and reliable connection to prevent suction loss.
Confirm the leaf blower vacuum door is properly positioned for vacuuming. This door directs airflow into the collection bag. Finally, attach the collection bag to the unit, verifying it’s firmly secured to capture leaves and debris effectively. Always double-check all connections before initiating vacuum mode for optimal performance and safety.
Bagging System & Emptying the Bag
The Craftsman leaf blower/vacuum utilizes a collection bag to gather debris during vacuum operation. This bag is designed for easy attachment and removal. To empty, detach the full bag carefully, ensuring the unit is switched off and unplugged for safety. Locate the bag’s release mechanism – typically a zipper or clip – and open it to dispose of the collected leaves and yard waste.
Inspect the bag regularly for damage, and replace it if necessary to maintain optimal suction. Properly securing the bag after emptying is crucial to prevent debris from escaping during vacuuming. A well-maintained bagging system ensures efficient and mess-free operation.
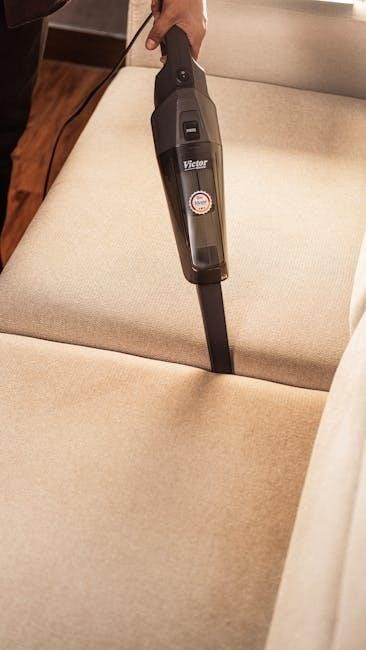
Vacuuming Techniques for Different Surfaces
Adjust your vacuuming technique based on the surface type for optimal debris removal. On hard surfaces like patios or driveways, use a sweeping motion, overlapping each pass slightly. For grass or loose dirt, a slower, more deliberate pace is recommended to maximize suction. Avoid vacuuming excessively wet leaves, as this can clog the impeller.
When vacuuming gravel, raise the nozzle slightly to prevent sucking up stones. Utilize the concentrator nozzle for focused suction in tight spaces or around obstacles. Regularly check the vacuum tube for blockages and clear them promptly to maintain performance.
Maintenance & Troubleshooting
Regular cleaning of the impeller housing and spring checks are vital. Addressing common issues like clogs or a malfunctioning door spring ensures peak performance.
Cleaning the Impeller Housing
Maintaining a clean impeller housing is crucial for optimal blower and vacuum performance. Before any cleaning, always disconnect the power source to prevent accidental starting. Access the impeller housing by carefully removing the cover, typically secured with screws. Inspect for debris like leaves, twigs, and dirt accumulation.
Use a soft brush or compressed air to gently dislodge and remove any obstructions. Avoid using sharp objects that could damage the impeller blades. Once cleared, thoroughly inspect the impeller for cracks or damage; replace if necessary. Reattach the cover securely, ensuring all screws are tightened. A clean impeller housing guarantees efficient airflow and suction, extending the lifespan of your Craftsman leaf blower/vacuum.
Replacing the Leaf Blower Vacuum Door Spring
A faulty leaf blower vacuum door spring hinders smooth mode switching. Begin by disconnecting the power supply for safety. Locate the spring retaining points on the vacuum door and the blower housing. Carefully remove the old, damaged spring – pliers may assist.
Install the new spring, ensuring it’s securely seated in both retaining points. Verify the door moves freely between blower and vacuum modes with appropriate tension. If resistance is felt, re-check spring placement. A properly functioning spring ensures effortless conversion and reliable operation of your Craftsman tool. Refer to parts diagrams for correct spring orientation.
Identifying Common Issues & Solutions
Reduced blower power often stems from a clogged impeller housing; disconnect power and clear debris. Vacuum mode with weak suction indicates a full bag or blockage in the vacuum tube – empty the bag and inspect the hose. If the unit won’t start, check the power cord, and ensure proper assembly.
A vibrating unit may have loose components; tighten all screws and bolts. For mode-switching difficulties, verify the door spring functionality. Always consult the owner’s manual for detailed troubleshooting steps and safety precautions before attempting repairs.

Warranty Information
Craftsman stands behind its products with a 3-year limited warranty covering defects in materials and workmanship from the date of purchase. This warranty applies to normal residential use and does not cover damage resulting from misuse, abuse, or improper maintenance.
To make a warranty claim, proof of purchase is required. Contact Craftsman customer support for assistance with repairs or replacements. See the complete warranty details, including limitations and exclusions, in the operating manual or on the Craftsman website. California residents, please note Proposition 65 warnings;